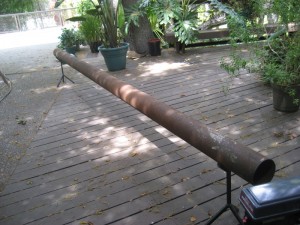
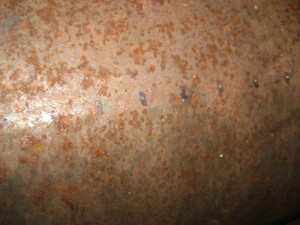
Years ago I bought a 6″OD, 20ft steel tube, with the intention of making Rubens tubes out of it. I hacked off 5 feet and put together a tube. However I wasn’t really satisfied with its performance. The tube never really resonated with the notes of the music, it only would pound with the bass. As such, I never followed up and built more tubes out of the other 15 feet of scrap I had. The tube sat in my backyard for years and quietly rusted. Just recently I moved to a new home in San Marino, where we have a great backyard for entertaining. And what could go better under our canopy of oak trees than a large Rubens tube. I decided to start this project anew in preparation for a summer of BBQs and parties.
Since I am just starting this project, I thought it’d be nice to document how I am building the tube for others to follow. Here are some step by step instructions.
Step 1. Mark the holes along the tube. I like to use a 1/2″ spacing. It’s important that the holes not be too far apart, or they won’t relight if they blow out. A tube that is unable to stay lit is at best a huge annoyance, and at worst extremely dangerous.
It’s easy to hold a tape measure along the tube and mark off each spot with a sharpie. I usually mark along the weld seam of the tube to make sure the holes are lined up. It’s my opinion that accurate holes are important to the aesthetics of a Rubens tube. My first tube was less accurate and it always bothered me.  You don’t need to bring the holes all the way to the end of the tube. I like to leave at least 2 inches on the speaker side, so the speaker cone doesn’t get too hot.
Follow the sharpie marks with a punch. This is very important to keep the drill bit from wandering before it starts cutting metal. The tube will ring loudly with each tap of the hammer, so I like to wear hearing protection.
Step 2. Drill. I haven’t drilled mine yet, but I will demonstrate that in a future post. I usually use a 1/16″ bit for the drilling, but since there are so many holes in this big tube, I’m going to try a smaller hole size: 3/64″. I can always drill them bigger later if that’s too small. The key to keeping your sanity while drilling is to use a friendly helper and a jig to support the tube. It’s not hard, but it takes a while and it’s worth keeping your patience while doing this task. My 15′ tube will require over 350 holes, so it’s worth buying extra bits for when they break or get dull.
Step 3. Cut out the flanges and endcap. On one end you’ll need a solid circle the diameter of your tube. I bought this one for a few bucks from Industrial Metal Supply. I’m going to drill a hole and weld/braze in the fitting for the propane hose. It’s all very simple really. The other end is a bit more complex. You need two rings, in which the OD is the OD of your speaker, while the ID isn’t as important. Using my oxy-acetylene torch, I cut these out of some scrap 1/8″ steel plate I had. One ring will be welded to the tube. The other ring will hold down a rubber membrane to seal the tube. The speaker will then be mounted to the whole thing. Propane will eventually eat through the rubber in a typical speaker, so it’s best to use something like a Buna-N type rubber sheet, which is resistant to propane.
Progress will be continued in future posts. Building a tube takes time. Since I never know how the tube will perform until all of the steps are complete, I can only hope that this one will be amazing. It’s definitely impressive in size.
You can read more in the following posts: Part 2, Part 3, Part 4.


Hello,
I was wondering if you make custom Ruben’s Tubes for sale. If so, how much and do they only come in one shape?
Thank you for your time and consideration,
EDWIN
I’ve built about 5 different tubes. I’m happy to build a custom Ruben’s Tube. I’m also very busy, so I can’t say I’ll get it done very quickly. Shoot me an email at busby.daniel@gmail.com and let’s figure something out.